There are many, many opportunities to get it wrong, not to mention the fact that even off-the-shelf window coverings can get quite expensive really quickly. But when done well, good window coverings can dramatically improve the cohesion of a room, and provide the appropriate function that works for your family in the home you've created.
In this house, I didn't keep any of the window coverings that were inherited at purchase, so I was starting from scratch. I also didn't really think about window coverings until after we moved in, so we had a good month-long stretch where we didn't have anything (or had very sub-standard coverings) on the windows (sorry, neighbors!).
If you've been reading this blog for long, you have probably noticed there are some things I move on like lightning and others that I like to mull over and really think through before I jump. Window treatments definitely fall into the latter camp.
I knew in most rooms we'd need custom-made curtains or shades, due to the dimensions we were working with, coupled with my inherent inability to live with "good enough" when it comes to certain home decor items.
Side note on all of the upcoming photos: photographing window coverings in front of a light-filled window is really hard. I'm not a gifted photographer, so the quality of these images is not great. Sorry.
In the formal living room and front parlor I decided on a really pretty neutral linen.

I am a fan of hanging draperies high and wide around the windows, and also allowing them to puddle on the ground an inch or two, so I needed quite a bit of yardage to get the look I wanted. After poking around in the fabric stores in town and ordering a few swatches from different online fabric stores, I ended up going with the "Judy" linen in Oatmeal from Gray Line Linens. Service and price were both great, and I'd definitely recommend them.
However, be warned that most, if not all, of the swatches I ordered from them look absolutely nothing like the images on their website. Just another good reminder to ALWAYS look at the fabric in person rather than relying on your monitor.

The dining room isn't a room where you need a lot of privacy, nor does it get strong, direct sun that would require closing it off, so I opted for roman shades here. The dark blue, combined with the wallpapered ceiling, made this room a particular challenge.
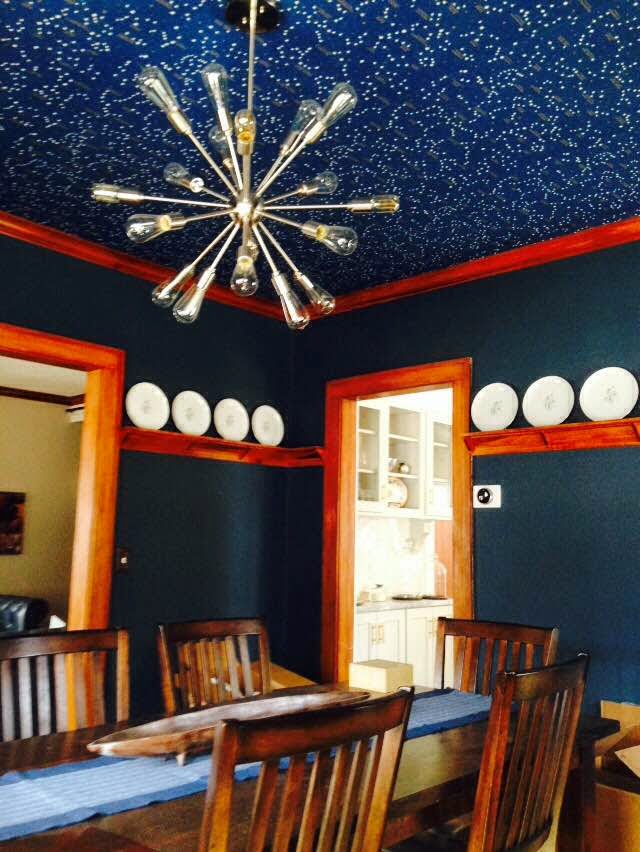
I needed a fabric for the shades that would tie everything together, but I really wanted something that would hold its own, not just blend in with the walls. I looked and looked and looked before I finally found the one:

It's a Robert Allen ikat and I just love it. It's going to look perfect in the room. My seamstress is working on the four shades now, so hopefully I can share pictures of the finished and installed final product soon. I'll most likely snap a shot for instagram as soon as they come in, so follow me there (jcintani) if you want a sneak peek :)
I just realized I haven't shared many images of the TV room yet, so I'll plan another blog on that soon. This is a cozy little room where we collapse in front of the TV at the end of a long day. Since it's just a space for our family and not a room we'd typically use for entertaining, I wanted to have a little fun in here.

I found this crazy fabric in a chartreuse/turquoise pattern and then to send it completely over the top I had my seamstress incorporate this adorable turquoise pom-pom trim around all the sides.

I am in love with how this shade turned out and think it looks great in here. In retrospect, the only thing I probably should have done differently is made it two smaller shades rather than the one MASSIVE shade. I went with one because I wanted a seamless look, but it is very, very big. I'm sure my seamstress would have preferred that option too, since I know this was a bear for her to sew. Oh well, lesson learned!
The last room for which I had treatments sewn is our bedroom. I haven't shown this room yet either because it's definitely still a work in progress. I'm going for spa-like and serene here, with a touch of glam. I chose two coordinating fabrics: one for the drapers, and one for the roman shade.
First up, the draperies:

This is a gorgeous heavy silk fabric to which I had the seamstress add a pretty silk trim. The color is hard to make out in these photos, but they are a pretty silver, charcoal grey, and muted aqua in an overscale floral pattern.
The draperies cover a big double window, so it was important they could block the morning light. You know, in the event that we EVER get to sleep in again.

The shade looks a little wonky in this photo, but it actually lays really nicely and looks better in person. I like that I can tie it up on that little fly thingy (I'm sure there is an actual name for it, but I don't know what it is).
So, overall the master bedroom is coming right along, but I do have a few more upgrades to put in place in that room before it's blogworthy.
Next, I wanted to show some window coverings I purchased from Lowe's. The following were ordered from their custom shade department, with which I was very pleasantly surprised. The quality, speed, and cost were all pretty great in my experience.
In the master bathroom, E's bathroom, and the powder bath, I ordered these simple top-down/bottom-up shades in a while linen.

I hired out the installation, and it seemed to take my guy only a few minutes to get each of them in place. It would have taken B and I hours, so we call that money well spent :).
In E's room I knew I needed something room-darkening. In her old bedroom I had blackout drapes, and while they were super functional, I didn't really like how thick and heavy the fabric was. They didn't lay very nicely either when open or closed, so I thought I'd try something new in her new bedroom.
I chose this roller shade (also from Lowe's) in a lovely grey linen:

It is just room-darkening (not blackout), so more light gets in than it used to, but it really hasn't been a problem at all as far as sleep is concerned.
When I started thinking about roller shades I of course flashed back to my childhood memories of tacky ivory plastic shades that would snap open and scare the bejeezus out of me. I didn't want to traumatize E in that way, so I carefully considered her window treatments before I purchased these. But, I have to say, I am really thrilled with the look, which definitely benefits from the nice grey linen fabric, but also from the ease of use. It's so simple to open and close her shade, and since we do it multiple times a day, I knew that would be important.
The Lowe's selection is impressive and I would highly recommend you check it out if you are in the market for custom window coverings. #notsponsored #iwish
I even had the option of adding on this adorable little valance that they trimmed out and everything. So cute, right?

Perfect for a little girl's room.
So, that takes care of the window coverings that I have done so far. There are still a few rooms that need something on the windows (office, guest room, etc.), but I'll get to those in due time.
Next time, I'll start showing the basement reveal.
Thanks for reading!
No comments:
Post a Comment